White balance part 1
White balance is a common problem for the amateur photographer. The modern camera can often focus and even expose photos quite correctly, but white balance i still something you can’t completely trust the camera to do if you want perfect results.
So what is white balance? Well to put it simple, it’s the temperature of the photo. The scale goes from blue to red much like your water tap, and the temperature is messured in kelvin.
A cold photo is bluish in it’s apperance while a warm photo is orange to red. Depending of what you are trying to achieve with your photo, a sunset or a cold rain, you can adjust the white balance to get the temperature you want. Here is an example.
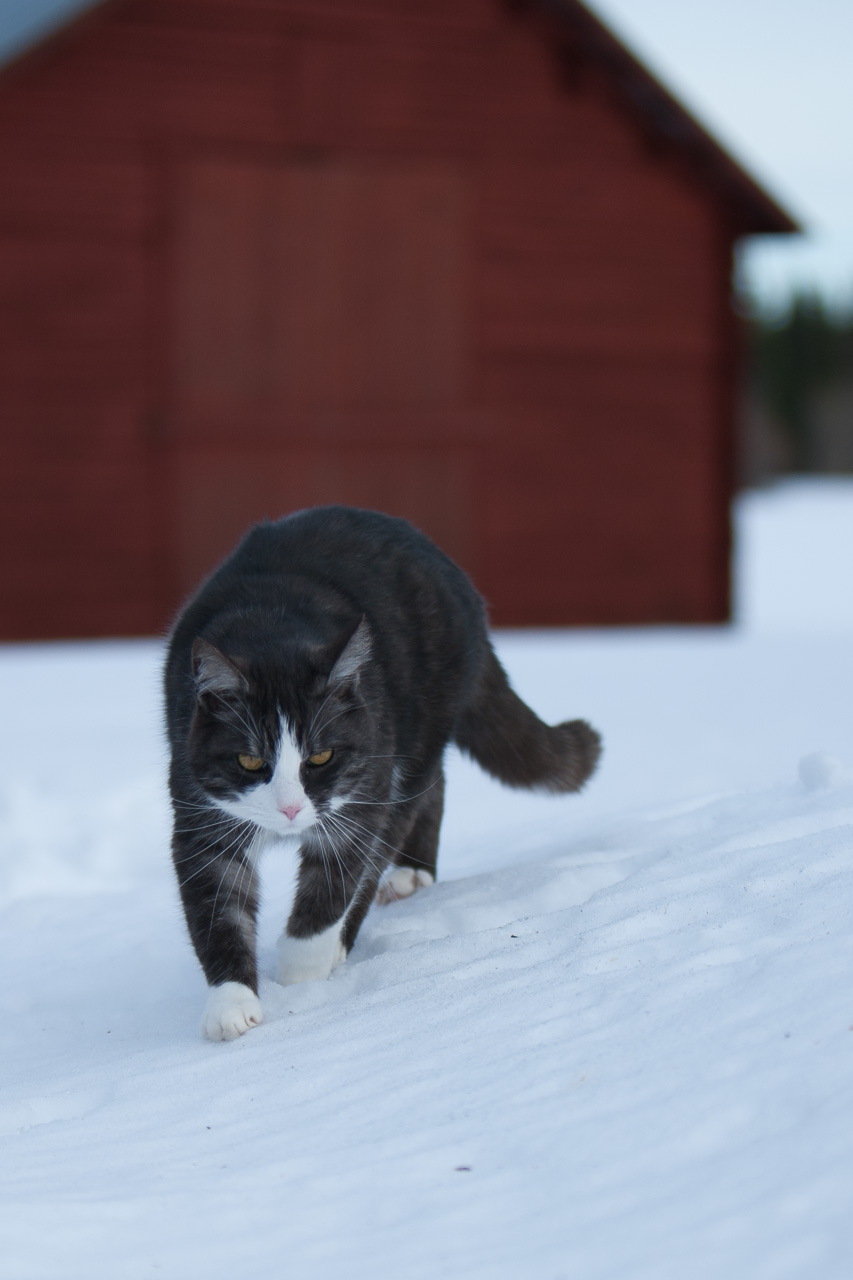
4700 K
As you can see this photo has a bluish character and it kind of looks like the sun has set and it’s getting dark. The problem is that this particular photo was taken in daylight and i would want it a bit warmer. Now there is two ways of getting this done.
You can either adjust it in the camera before shooting, or adjust it later in post process.
If you only shoot jpeg I strongly advice setting the white balance correctly in the camera, since jpeg is much more difficult to adjust in post. If you shoot raw there is no need to set the white balance in the camera since you can adjust it perfectly in post. However you will get a much better understanding of color temperatures if you try setting the white balance in the field.
A typical DSLR has many different presets for white balance, including two manual modes. This was taken from the 5d Mark II manual (sorry for the crappy photo).
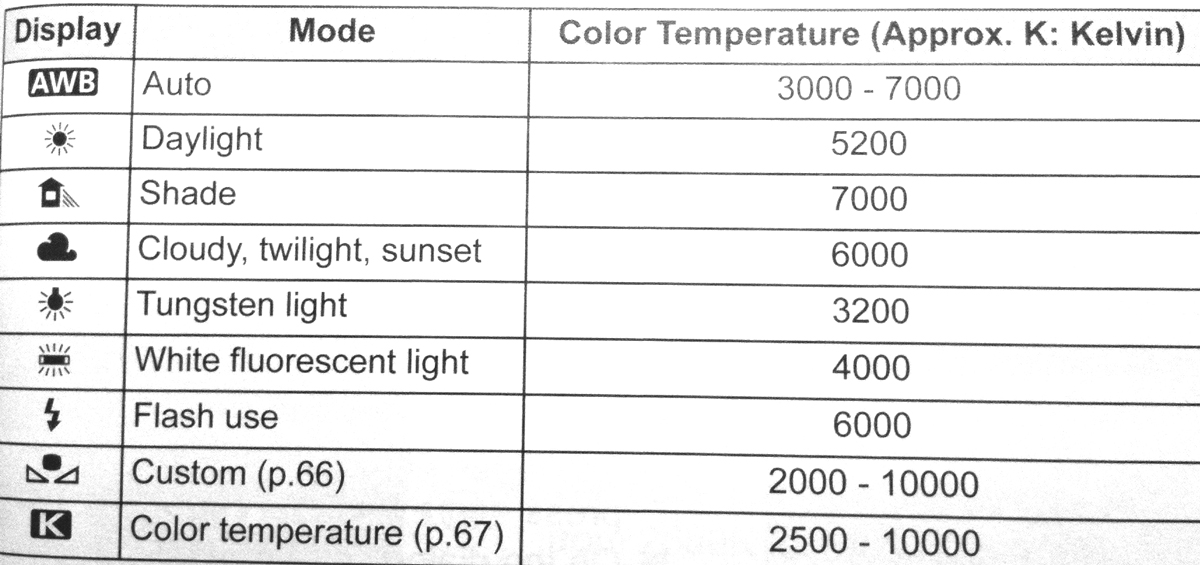
White balance modes, 5d Mark II.
As you can see there are plenty of settings to chose from. Try them! There is definitely times when the produce a much better and pleasing photo than the auto white balance (AWB). The two settings at the bottom, custom and color temperature, are manual settings and I will explain them in part 2 of this tutorial. Now to confuse things a bit, the kelvin scale on a camera is backwards. Normally higher number would mean colder light and vice versa, but the camera is not showing the actual Kelvin, it’s showing a level of compensation. Ignore this bit of fact for now and lets go back to the photo of the cat.
So the cat above was walking in the shade. As you can see there is little or no shadows coming from the cat. If I were to chose the white balance mode “shade” the photo would have come out like this.
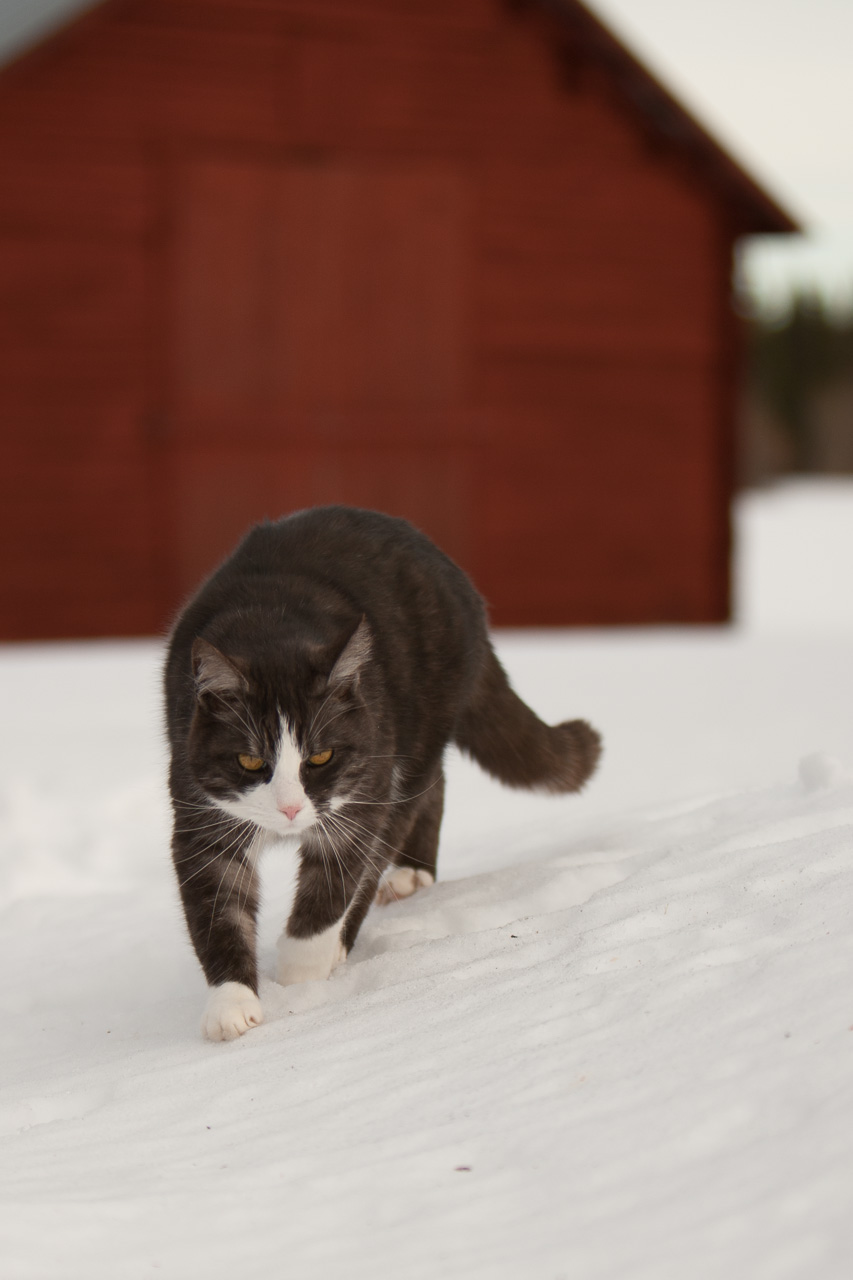
Kelvin 7000
A clearly warmer photo and we got the daylight feeling again. In the end it’s what you prefers that matter, but if you own a DSLR or any camera where you can set white balance, Try It.
/Sven
Recent Comments