Exposure part 1
Metering methods in Canon 5d Mark II
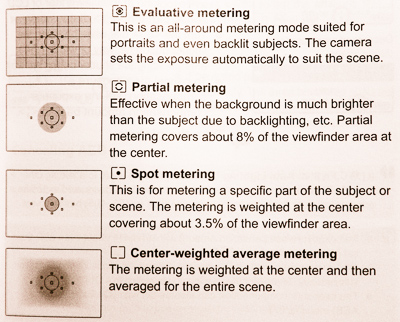
Exposure Part 1. There are many different teachings of how to expose a photo correctly. This tutorial aims to give a better understanding of how the camera meters light and how to use different techniques to get a better exposed photo. Most modern DSLR’s have three or for different methods of metering light. An explanation of the different methods can usually be found in the camera manual as shown in the picture below. There is little difference between brands and the symbols are often the same. The evaluative metering is probably the most commonly used and often results in a properly exposed photo. There are however times when this method is not the preferred one. For example when the subject you’re trying to photograph stands in sharp contrast to it’s surroundings. I will give you an extreme example. This is Johans dog Diesel who often joins us on our local strolls in woods and fields around Västerdal. His fur is brown and black with streaks of gray which is excellent for practicing exposure.
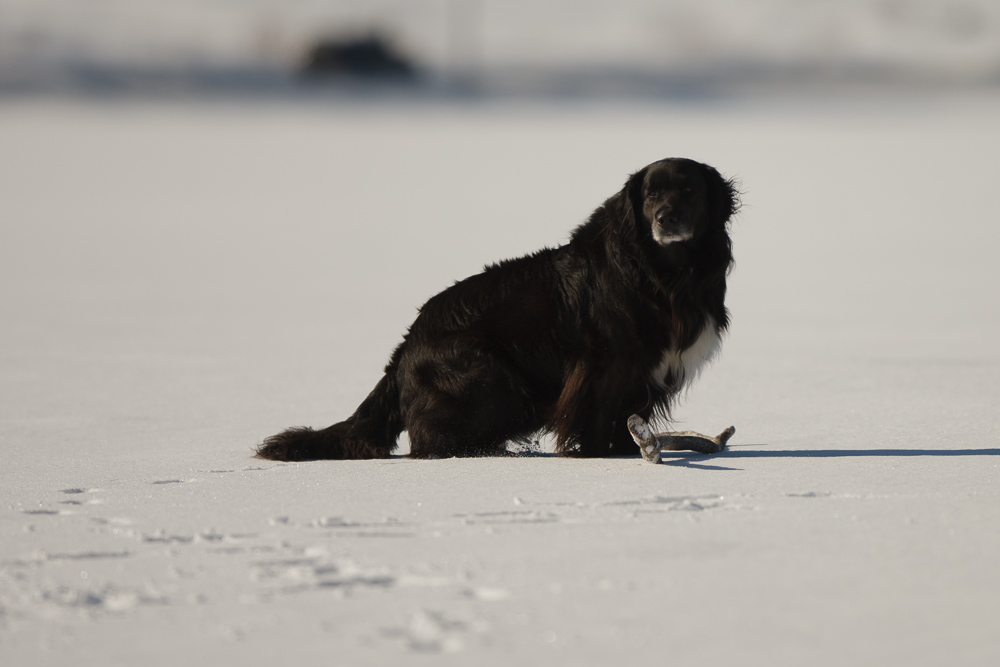
Diesel the dog, Canon 1d Mark III, 300 f/2.8 IS, f/2.8 ISO 100, 1/5000s
As you can see the dog is very underexposed in this photo due to the strong contrast with the white snow. The snow is also very gray. In this case evaluative metering was used, but partial metering or even spot metering would have been a better choice and perhaps the exposure would come out like the photo below. So how do we know when to change metering mode or even expose manually? Most of the answers can be found when viewing the histogram, that can be brought up on your camera screen by pressing the info button a few times after you have taken photo. This of course means that you have to take a test photo, but with training you will be able to guess exposure compensation and metering mode pretty well.
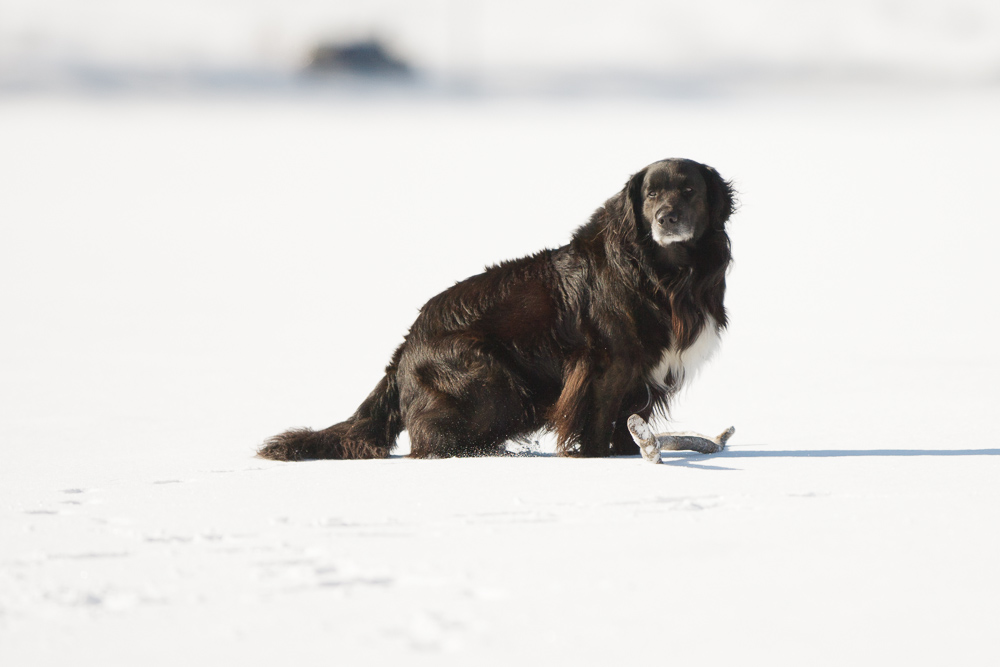
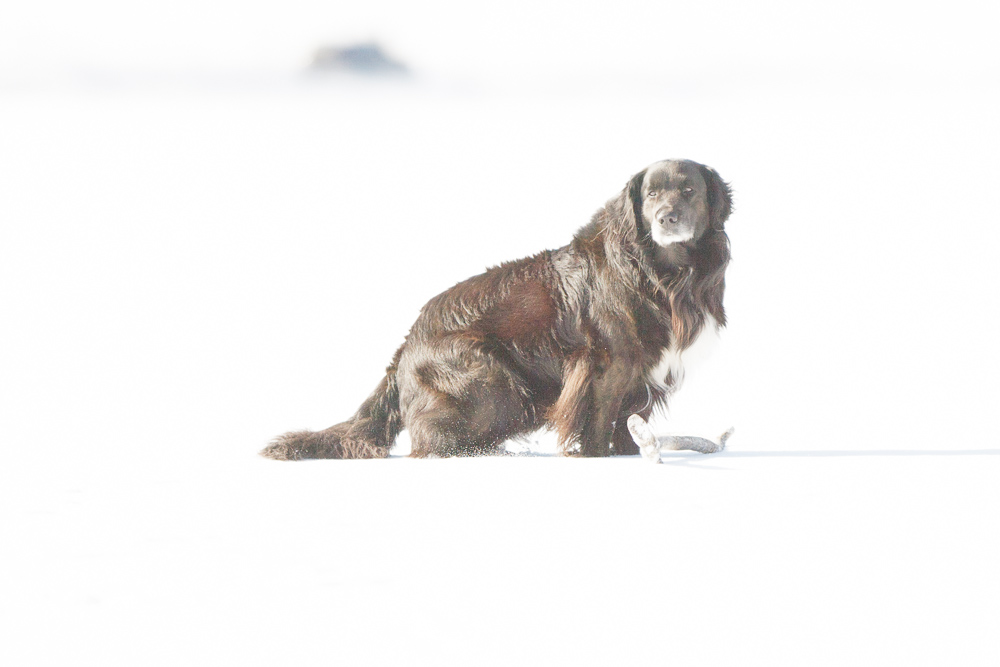
Diesel the dog, Canon 1d Mark III, 300 f/2.8 IS, f/2.8 ISO 100, 1/5000s +2 exposure.
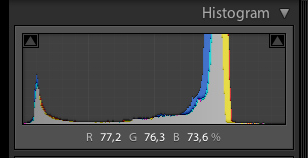
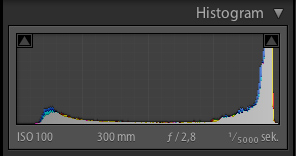
Original histogram Diesel
Let’s look at the histogram of the first photo of Diesel. It’s a screenshot from Lightroom but the principle is the same as in the camera histogram. The histogram shows light colors to the right and dark colors to the left. In this histogram colors are shown and as you can see there aren’t much colors in this picture . There are two peaks. The biggest peak represents the snow and is placed between the third and fourth quarter of the histogram from the left (not really where bright white snow should be). The smaller peak to the left is Diesel. To make Diesel brighter and the snow whiter we need to move the entire histogram to the right. Ideally the histogram should be balanced and spread evenly from left to right. This can be done in post process as I did, but at the risk of losing details and increasing noise. Some cameras handle’s shadow pushing and exposure pushing extremely well, for example Nikons D800. Others start showing artifacts even with moderate pushing. With this in consideration it’s always best to check and get the exposure right in the field. Don’t rely on post process to save a poorly exposed picture and don’t trust your camera screen to present the accurate exposure in review. Ok so the histogram of the photo you took looked something like this, and you decided to change metering mode.
+2 stop exposure of Diesel
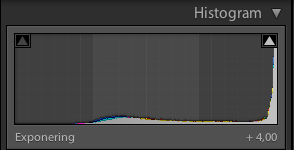
Hopefully you would end up with this histogram (a two stop exposure difference). Notice the changes in the sharp peak to the left that represent’s Diesel. By increasing exposure we have created a greater span over the darker tones that stretches on to the second quarter of this histogram. I would say that this is a fairly correct exposed photo.
Now lets look at a completely over exposed Diesel. The area that represents diesel is now pushed into the mid tones and the white snow has been pushed where no color contrast can be displayed, commonly known as “burned highlights”. Fortunately the camera has an option to display these areas as a blinking red warning . In Canon and Nikon cameras it’s called Highlight alert. I recommend to turn this option on even if it sometimes can get annoying.
+4 stop exposure of Diesel
Diesel the dog, Canon 1d Mark III, 300 f/2.8 IS, f/2.8 ISO 100, 1/5000s +4 exposure
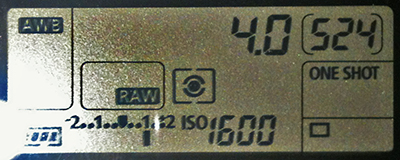
Exposure compensation +1 stop
By changing metering mode you are still letting the camera decide how to expose the photo, you are just telling it where to read the light. It’s often a good and easy way of getting the exposure right, or close to right. There is however another way of changing exposure and that is to use exposure compensation. This I easily done by turning the dial on the back of the camera, if you own a canon. Nikon owners have to press the exposure compensation button [+/-] at the top and then turn the main control dial. The image below shows a +1 stop exposure compensation on a canon camera (directly to the left of the ISO sign). As you can see the exposure compensation goes from -2 to +2 in 1/3 increments. Remember to dial the compensation back to zero after shooting since the next subject could be correctly metered by the camera.
This is all for part 1. Go out and shoot and remember to check that histogram.
Regards
Sven
Recent Comments